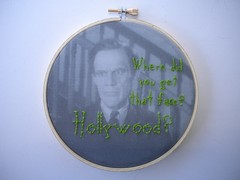
One of my current favorite ways to embroidery is to print a photo and what I want to embroider directly on the fabric. I've been printing on fabric for a few years thanks to this tutorial on instructables, and have actually broken two printers because I just had to print a couple of 5 foot scrolls (I should have learned my lesson after the first one, but it was a couple of years later and I forgot). The first time I used this technique for embroidery was for the Shut Up Woman Get On My Horse post.
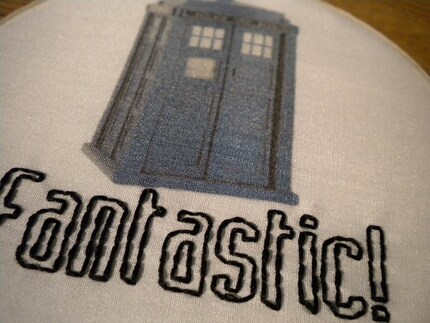
I thought I would share a quick tutorial/process of making one of these super easy embroidery pieces. First of all, I choose my image. I'm majorly into Doctor Who right now, so the TARDIS was a natural choice.

I was suffering a major creative block, so I went with the first thing I could think of, "Fantastic!" and put the text in. I used the font Assiduous (aka - the Doctor Who font) in an outliney way to make it easier for embroidering

Now that I've got the image I want, now it's time to gather the supplies. For this project you'll need:
- Freezer Paper
- Fabric
- Felt
- A sheet of paper
- An embroidery hoop
- Embroidery floss & needle
- Scissors (I used both my normal cutting scissors and my stitch scissors)
- Hoop for holding the project (I use Q-Snaps)
- Tacky glue

Next comes the parts in the instructables tutorial. Cut your freezer paper the size of a normal sheet of paper, iron the shiny side to a piece of fabric, trim as needed, and put it in your printer. Make sure that the fabric is the side you'll be printing on.


So you're all ready for printing. I've made a couple of these before, so I know roughly what size I need. The project will be put into a 5" hoop when it's done, so I printed it slightly under that size. If you aren't sure and don't want to waste fabric, just print the image (Tip: grayscale will save ink!) on a piece of paper and hold your hoop over it to see how the image will look.

Here is my design straight out of the printer

Remove the freezer paper and hoop the fabric. You're ready to stitch!

If you're using a very thin fabric like I do, the appearance will look kind of wonky until you get it into the tight hoop.

To provide a nice bit of backing to hide the back of your project, you can cut out a circle of felt to stick in the back. I just put the hoop over the felt, draw a circle, and cut the circle out.

Place your fabric into the embroidery hoop and place it how you want. Tighten the hoop as much as you can without causing too much strain on it.

Flip it over and trim the excess fabric, leaving about 1/2" all around. Add the felt circle during this time.

Get out the tacky glue and start gluing! Spread the glue over the hoop and start folding the fabric down.

Turn it over and you're done!

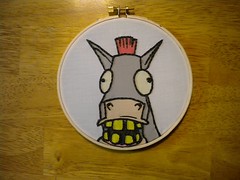
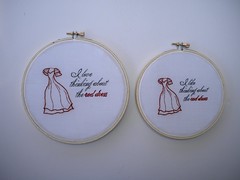
Here are a few of my other projects using the same technique:


1 comment:
This is cool Shae. What a fun tutorial!
Post a Comment